 Signin
FAQ
Web Document
Quick Setup Guide – TMDsuite Retail Billing Software.
Step 0: Buy a Plan & Register
Go to: https://www.tmdsuite.com/pricing
➤ Choose the right plan (Beginner, Small Business, Medium, or Large)
➤ Click Buy Now
Register here: https://www.tmdsuite.com/register
➤ Fill in your store name, email, and mobile number
➤ On successful registration, your unique store URL will be created
Step 1: Log in to Your Store
Open your store dashboard using the URL shown after registration success
Example: https://yourstore.tmdsuite.com/frontdesk/
Enter your Admin Username and Password
Click Login
Step 2: Set Up Store Profile
Go to the Left bar: Settings → Profile Settings
Configure:
Store Name, Owner, Address, Email, Phone
GST No. GST Type, Currency, Language, Timezone
Store Bank Account, Invoice Prefix, and Region
Add Store Logo, Signature, and Icon
Step 3: Add Categories & Products
Create product categories: Catalog → Category
Add individual products: Catalog → Product
Or bulk import with .CSV/.XLS: Product → Bulk Import
Step 4: Add Customer Groups & Customers
Create customer groups (Retail, Wholesale, etc.):
Crm → Customer Group
Add customers manually with name, mobile, and address
Step 5: Set Up Bank Accounts
Accounts → Bank Accounts
Add your bank account(s) to manage store payments and cash tracking
Step 6: Configure POS Settings
Navigate to: Settings → Pos Settings to customize:
Customer Form and Default Group
Invoice Layout and PayNow Button
Return Reasons, Payment Methods
Shipping Charges, Display Options
Non-Catalog Product Handling
Step 7: Configure Tax & GST
Go to: Settings → Profile Settings
Choose GST Type (Include, Exclude)
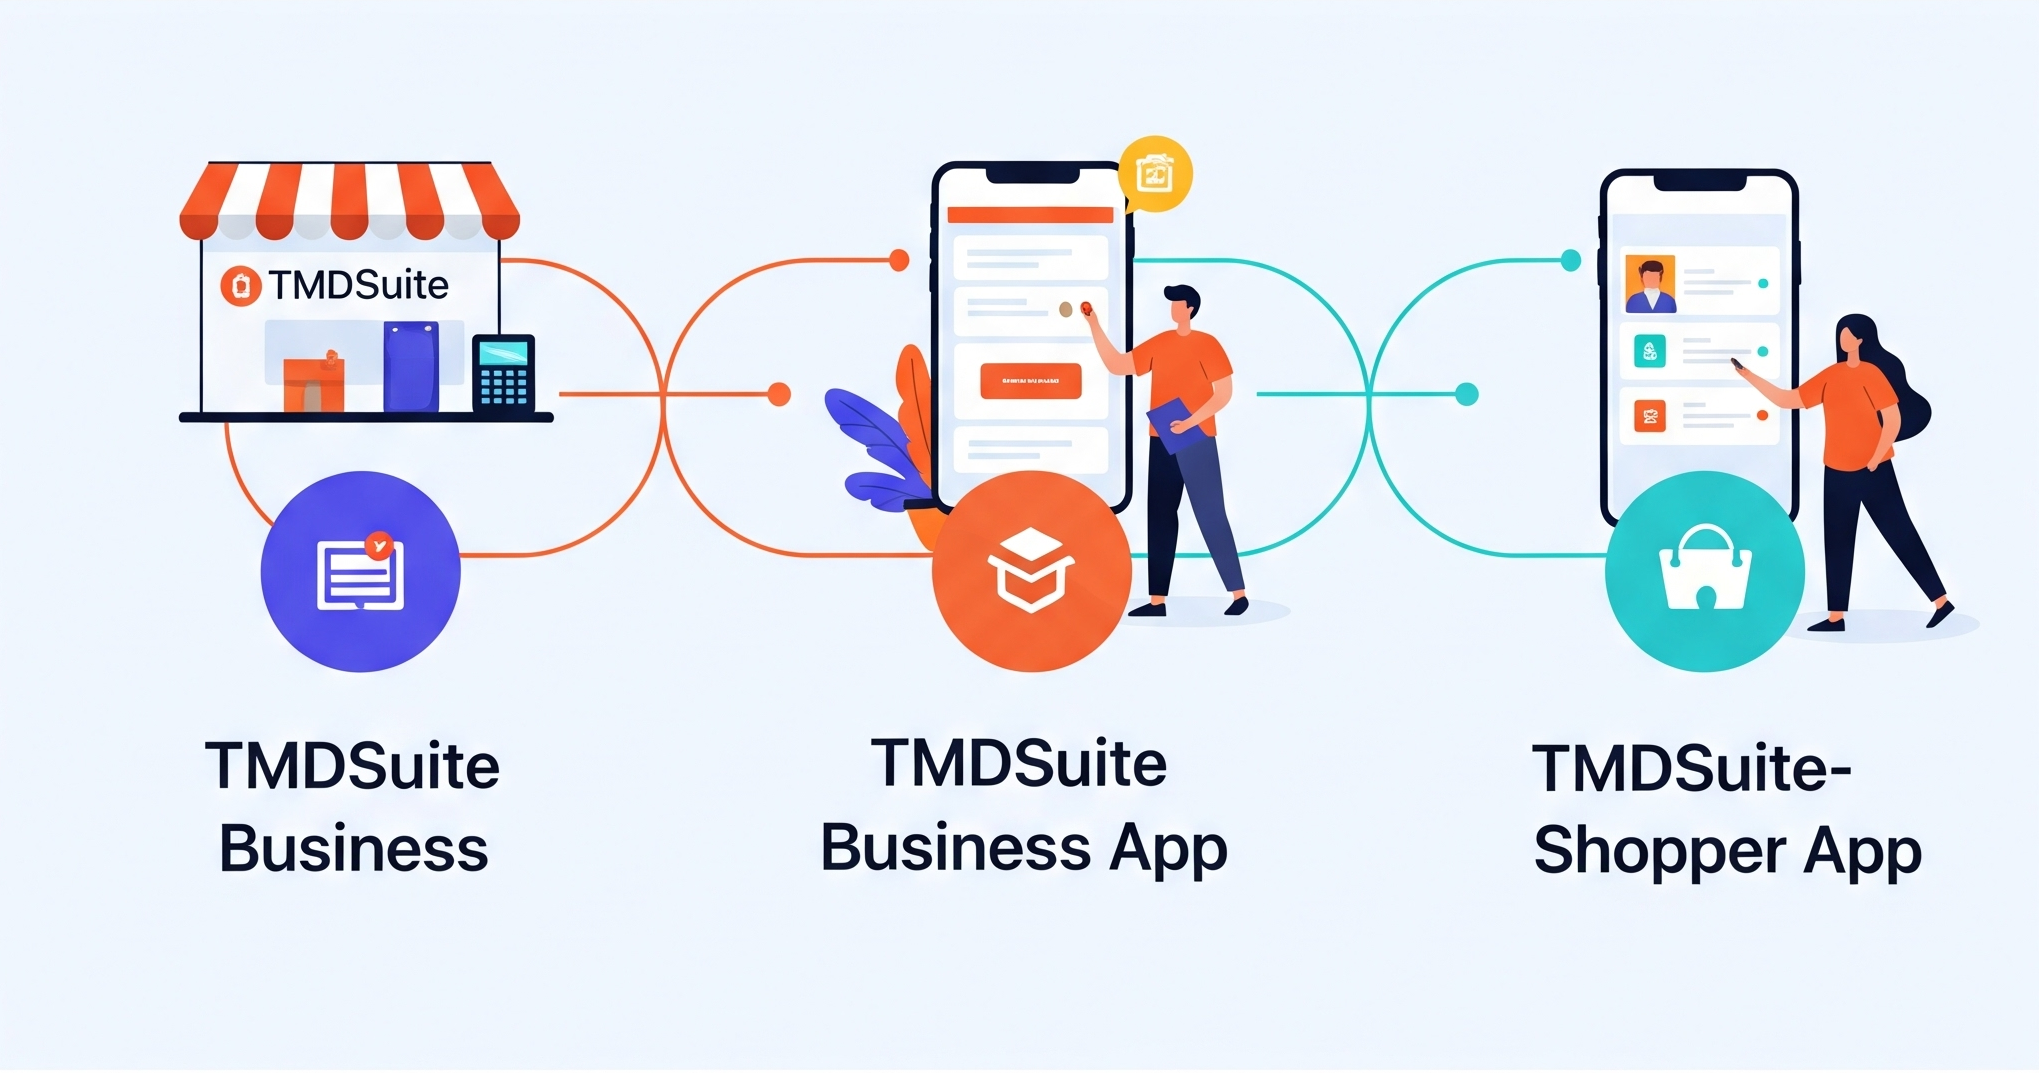
Step 8: Install TMDsuite Mobile Apps
TMDsuite Business App (for store owners):
Use this app to:
Manage billing, stock, orders, returns, and reports
View sales in real-time
Create and process orders
TMDsuite Shopper App (for your customers)
Let your customers:
Scan your store QR code
View your product catalog directly in the app
Place orders remotely from anywhere
This helps your store go digital and accept remote orders easily — great for home delivery, pre-ordering, or customer convenience.
Download From Playstore
You can find and print your store QR codes under:
Settings → Tmdshopper Setting
Step 9: Set Up Purchase Order
Add suppliers: PO → Suppliers
Create Purchase Orders and Supplier Bills
Track stock received, payments, and dues
Step 10: Start Billing and Selling
Go to: POS → Open POS
Add or scan a product
Select customer
Apply discounts or rewards
Print invoice and collect payment (Cash/UPI/Card)
The Dashboard shown in the icon image is the main control panel for the TMD Suite software. It provides a clean and intuitive interface for shop owners or retail businesses to manage daily operations. This Dashboard acts as the central hub for running your retail business operations efficiently — from managing stock and sales to generating barcodes, viewing reports, and adjusting system settings.
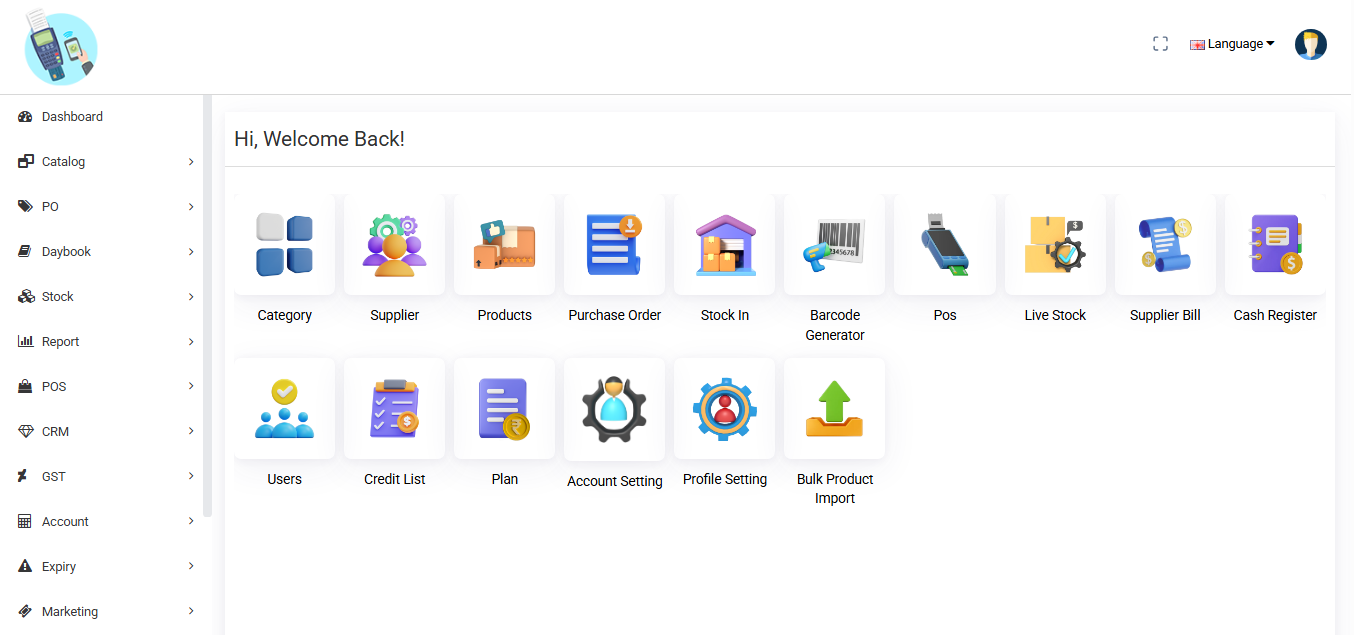
Category - Manage product categories
Supplier - Add and manage supplier information
Products - Add, update, or delete products
Purchase Order - Create and manage POs from suppliers
Stock In - Add received stock into inventory
Barcode Generator - Create barcodes for products
POS - Open point-of-sale terminal
Live Stock - Real-time inventory overview
Supplier Bill - Track and manage bills from suppliers
Cash Register - Manage daily cash flow
Users - Add or control user access
Credit List - View customers with pending credit
Plan - Manage the current pricing plan
Account Setting - Configure account-specific settings
Profile Setting - Change user profile settings
Bulk Product Import - Import multiple products using a file
To manage payments and transactions, you need to link each supplier with an account.
Fields Explained:
1. Supplier Account
Detail: Select the supplier from the list. This connects the account details to a specific supplier.
2. Account No
Detail: Enter the account number used for transactions with this supplier. This could be a bank account number or internal reference.
3. Save

To sell a product through POS, you must first add the product.
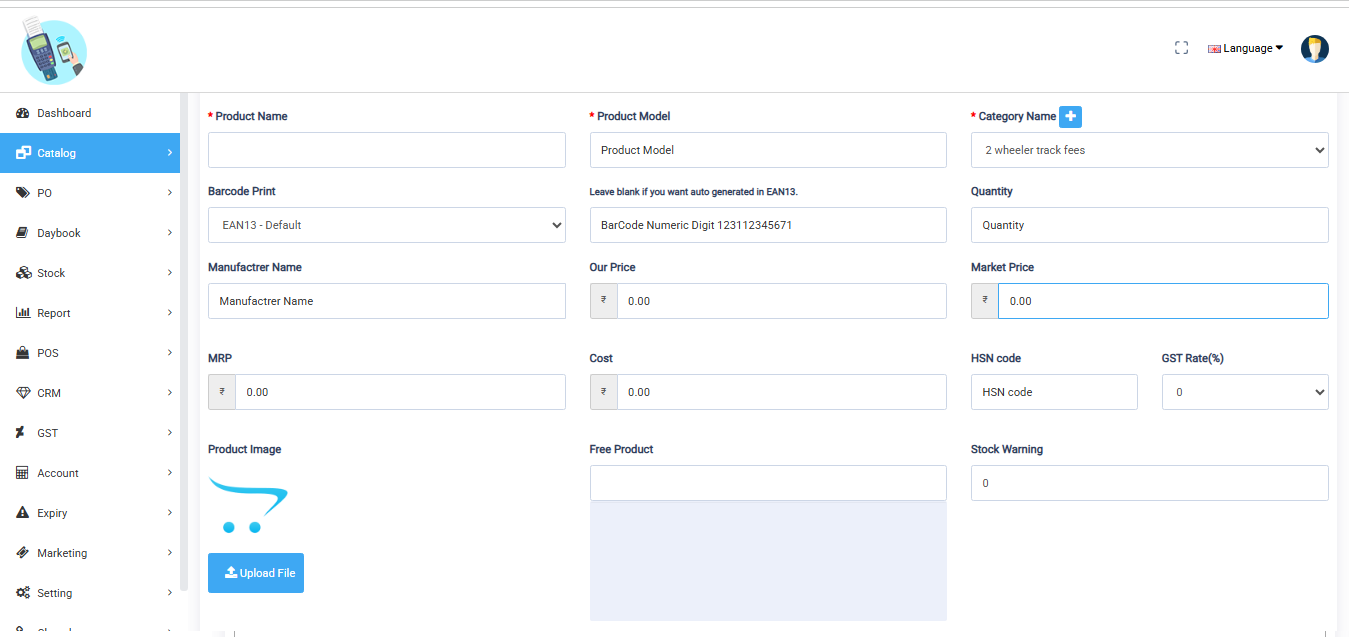
Steps to Add a New Product
1. Product Name
Detail: Enter a descriptive and accurate product name.
2. Model
Detail: Enter the unique model number or identifier for the product. This helps in tracking and managing inventory accurately.
3. Select Category
Detail: Choose the appropriate category to assign the product. This helps organize products in your store.
4. Barcode Type
Detail: Select the barcode type to use for printing, such as Code128 or EAN13. This defines the format of the printed barcode.
5. Product Quantity
Detail: Enter the available stock quantity for the product. This helps manage inventory and control stock levels in your store.
6. Manufacturer Name
Detail: Select or enter the manufacturer or brand name of the product. This helps customers identify the product’s origin or brand.
7. Our Price
Detail: Enter the selling price of the product that will be displayed to customers in your store.
8. Market Price
Detail: Enter the original or regular market price of the product. This is used to show discounts or savings compared to your selling price
9. MRP (Maximum Retail Price)
Detail: Enter the maximum price at which the product can be sold to customers. This is usually printed on the product packaging.
9. Cost
Detail: Enter the purchase or production cost of the product. This is used for profit margin and internal accounting purposes.
10. HSN Code
Detail: Enter the HSN (Harmonized System of Nomenclature) code for the product. It is used for tax classification under GST.
11. GST Rate (%)
Detail: Select the applicable GST rate for the product. This rate will be used to calculate tax during billing.
12. Product Image
Detail: Upload a clear image of the product. Use JPG or PNG format to visually represent the item in your store.
13. Select Free Product
Detail: Choose a product to offer for free with this item, if part of a promotional deal or combo offer.
14. Stock Warning
Detail: Set a minimum stock level to trigger a low stock alert. This helps you restock products on time.
15. Save Button
Detail: Click the Save button to store the product details in your system. Usually located at the top right corner.
A category organizes products into groups, making it easier for customers to navigate, search, and find items. It also helps in managing and displaying products systematically in the store.
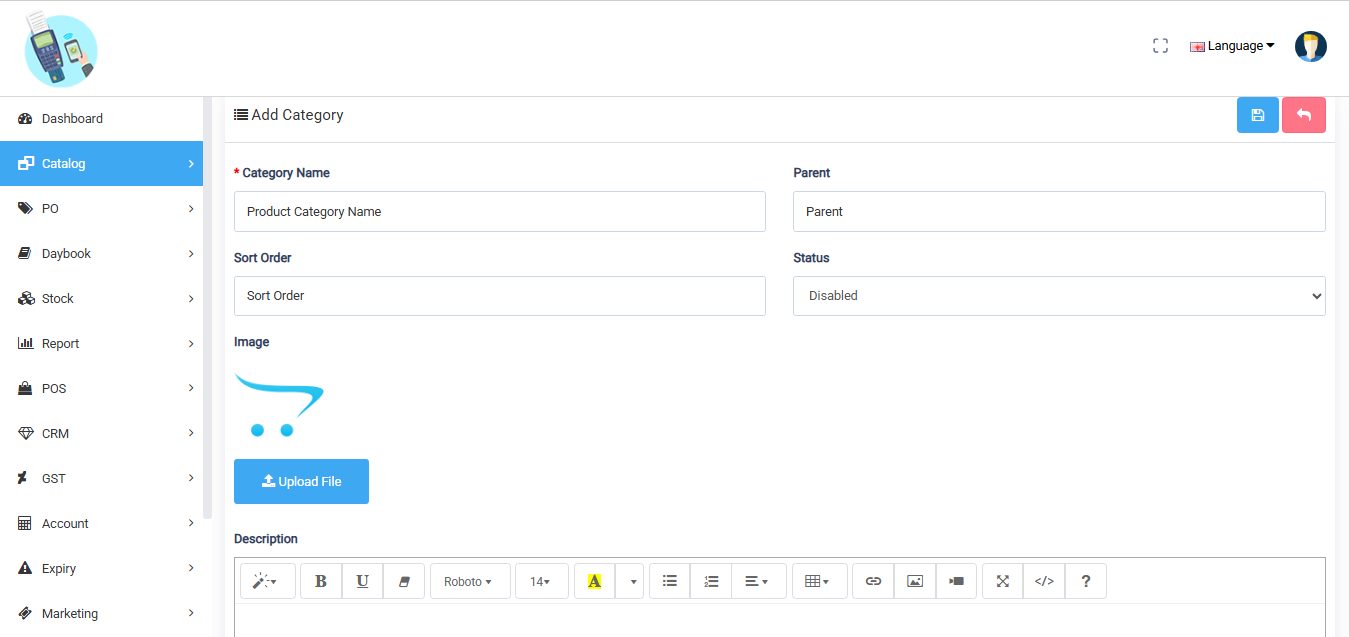
Steps to Add a Product Category in TMDSuite
1. Category Name
Detail: Add Category Name. This may appear in the store.
2. Parent
Detail: Select a parent category to make this a subcategory.
3. Sort Order
Detail: Add sort order to organize the position of the category.
4. Status
Detail: Choose the status to show or hide this category on your store.
5. Upload an Image
Detail: Upload a representative image for the category to enhance its appearance in the store.
Please use JPG or PNG format.
6. Description
Detail: Add a description to provide more information about the category.
7. Save Button
Detail: Use the Save button at the top right corner to save the category to your store.
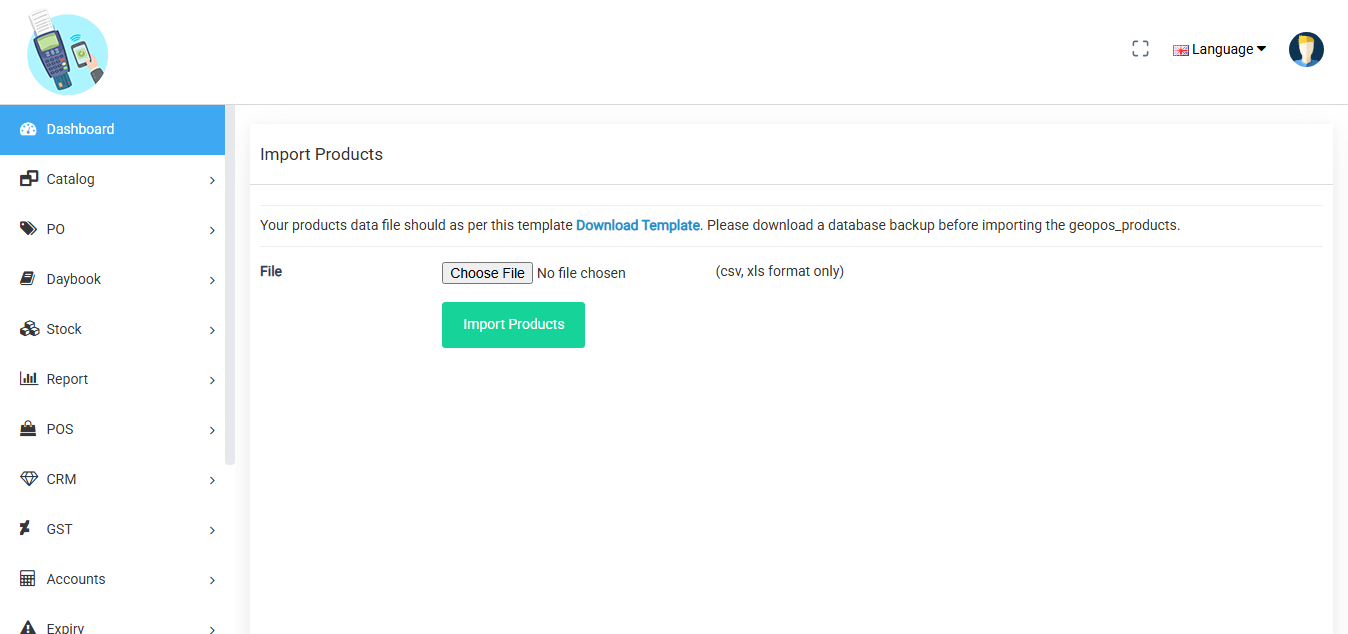
The Bulk Product Import feature allows store owners to upload multiple products at once into the system using CSV or XLS files. This saves time, reduces manual entry, and helps maintain a consistent product database.
Supported File Types
.CSV (Comma-Separated Values)
.XLS (Excel Spreadsheet)
Bulk Product Import
Steps to Import Products
1. Go to
Dashboard → Bulk Product Import
2. Download Sample File
Click on the “Download Sample CSV/XLS” button.
This sample contains the required columns and format.
3. Fill in Product Data
Open the downloaded file and fill product info:
Product Name
Model
SKU
Category
Purchase Order Price
MRP
Retailer Price
Quantity
After full details of all products
Upload File
Click “Choose File” and upload your filled CSV or XLS file.
Import Products
Click “Import.”
The system validates the data and inserts products into your catalog.
To create a coupon, visit in TMDSUite panel.
Go to Marketing > Coupon
Click Add New Coupon
Set: Coupon Code (e.g., SAVE20)
Discount Type (Flat or Percentage)
Usage Limit Valid From / To
Customers and salespeople can apply it during billing in the POS or online store cart page.
This feature allows you to create and manage discount codes that can be applied during billing.
A product barcode is a unique visual representation of data, typically in the form of vertical lines or patterns, that encodes information about a product. It is used to identify items quickly and accurately in inventory, sales, or logistics processes.
Steps to generate a product barcode
Go to Barcode Generator
In the left menu, click Catalog → Barcode Generator.
Search Product
Use the search bar to find the product by UPC or name.
Generate & Print
Click the green printer icon next to the product.
This will create a barcode label.
Use your connected printer to print it.
Expiry Management in TMDsuite helps retail store owners track and manage products with expiry dates, especially useful for groceries, medicines, cosmetics, and perishable items.
Purpose of Expiry Management
To avoid selling expired items
To clear near-expiry stock on time
To maintain customer safety and trust
To ensure legal compliance in industries like food and pharma
Features in Expiry Management
1. Expiry Report
Shows a list of products with expiry dates.
Highlight which products are nearing expiry or have already expired.
Can be filtered by product, brand, category, or date range.
Use it to monitor expiry-sensitive stock.
2. Expiry Stock Out
Let you remove expired products from the inventory.
Helps update stock levels by marking expired items as unusable.
Can also track losses due to expired stock.
Helps clean expired inventory and keep records.
3. Expiry Status
Gives a summary view of expiry stock:
Total expiring this month
Already expired
Safe stock
Color-coded or sectioned by urgency.
Helps prioritize the clearance or promotion of soon-to-expire products.
4. Exchange Report
Records all items that were exchanged due to expiry.
Shows which expired items were returned by customers or replaced internally.
Maintains accountability with quantity, date, and reason.
Useful for tracking customer returns or supplier replacements.
A non-catalog product on a POS (Point of Sale) system refers to an item that is not pre-registered in the product database. Instead, it is manually added during a transaction when the item is not available in the system's catalog or inventory.
How to Add a Non-Catalog Product in POS:
Click on "Non-Catalog Product" (or a similar option like "Miscellaneous Item").
Enter Product Details:
Name: (E.g., "Custom Engraving Service")
Model/SKU: (Optional, if applicable)
Price: (Enter the selling price)
Quantity: (Number of units sold)
Click "Add Product" (or "Confirm") to include it in the cart.
Complete the Sale – The item will be processed like any other product in the transaction.
The Day Book form in this web application records daily financial transactions. It tracks cash inflows and outflows, offering a consolidated view of daily business activity. This tool helps manage accounts, reconcile cash, and maintain accurate financial records for better operational control and analysis.
Fields Explained:
Check the selected date before adding the daybook detail.
1. Opening Balance
Detail: Enter the cash amount available at the beginning of the day.
2. Card
Detail: Enter the total amount received through card payments.
3. UPI
Detail: Enter the amount received via Paytm or any UPI/digital wallet.
4. Manual Entry
Detail: Add any other manual entries, such as expenses or adjustments made during the day.
Manual Account Entry is a feature in TMDSuite that allows the shopkeeper or admin to manually record financial transactions that may not be directly linked to sales, purchases, or automated operations in the system.
Purpose of Manual Account Entry:
To add or adjust balances for internal transactions
How It Works:
Go to Account → Manual Account Entry
Select Account Type (e.g., Expense, Income, Bank)
Enter:
Amount
Transaction Date
Description or Note
Click Submit
The amount gets reflected in the account reports or ledgers.
The Marketing Panel in TMDsuite helps shop owners engage with customers, boost sales, and run promotions using two powerful tools:
1. Campaign (WhatsApp Marketing)
This feature allows you to send promotional messages directly to customers on WhatsApp.
Send offers, discounts, and product updates
Notify about new stock or sale events
Target specific customer groups (e.g., frequent buyers)
How It Works:
Go to Marketing > Campaign
Select customers or upload numbers
Write your message
Attach images or links if needed
Send via WhatsApp API integration or bulk sender
2. Coupon (Discount on Sale)
This feature allows you to create and manage discount codes that can be applied during billing.
Create flat or percentage discounts (e.g., ₹50 OFF or 10% OFF)
Set conditions: minimum cart amount, valid dates, usage limits
Promote through WhatsApp Campaigns or in-store banners
How It Works:
Go to Marketing > Coupon
Click Add New Coupon
Set: Coupon Code (e.g., SAVE20)
Discount Type (Flat or Percentage)
Usage Limit Valid From / To
Customers can apply it during billing in the POS or online
Here’s a detailed explanation of each field in the Shop Profile Setting section in TMDSuite — these settings define the core identity, compliance, and behavior of your store in the system.
Profile Setting – Field
Store Name
The official name of your shop (e.g., "TMD Electronics"). This appears on invoices and front-end.
Store Title
A short tag line or title for branding. Often shown in browser tabs or headers.
Store Owner
The person or company legally owning the store. Useful for admin records and documentation.
Address
The complete business location address – used in invoices, shipping, and contact purposes.
Primary contact email of the store – for customer inquiries, order notifications, etc.
Telephone
The store's contact number is shown on invoices or customer queries.
Fassi Code
A store-specific business or internal code (optional), often used for barcode or inventory tracking.
GST No.
Your registered Goods & Services Tax number (India-specific) used in tax calculation and invoicing.
GST Type
Type of GST applied to the product price. include, Exclude.
Country
The country where the store operates impacts currency, tax, and legal configuration.
Region / State
The specific region or state of your store (used for region-based taxes and shipping rules).
Language
The default language used across the POS or web store interface.
Currency
Base currency for product prices, transactions, and financial reports.
Time Zone
Sets the system time zone for orders, billing timestamps, and reports.
Store Bank Account
Select the Bank account for the customer's payments and refunds.
Invoice Prefix
Short prefix added before invoice numbers (e.g., INV2025-) to help with invoice series management.
Complete Order Status
Short prefix added before invoice numbers (e.g., INV2025-) to help with invoice series management.
Autogenerated PO Quantity
Autogenerated PO Quantity is a smart feature in TMDsuite that automatically suggests or fills product quantities in a Purchase Order (PO).
PO Processed Status
Status to be set once a Purchase Order (PO) is confirmed and processed.
PO Due Status
Status to identify stock-in, processed, and partially received.
Default Items Per Page
Sets how many records/products are shown per page in listings – improves pagination.
Store Logo
Upload your store’s logo – displayed on invoice, login screens, dashboard, etc.
Signature Image (for invoice)
Upload a scanned or digital signature – automatically printed on invoices.
Status
Enable or disable the store – disabled means POS/webstore functions are inactive.
TMDSuite Web Application, explaining its purpose and usefulness for business reports.
1. Sale Report
Purpose: Provides a detailed record of all sales transactions within a selected period.
Use Case: Track revenue, analyze sales trends, and reconcile daily/monthly sales.
2. Day Summary
Purpose: A consolidated overview of the day’s business activities, including total sales, returns, and payments.
Use Case: Quick daily performance check for managers.
3. Product Sales
Purpose: Lists all products sold with quantities, prices, and revenue contribution.
Use Case: Identify top-performing products and inventory demand.
4. Credit Report
Purpose: Tracks all credit-based sales (unpaid invoices or customer dues).
Use Case: Monitor outstanding payments and follow up with customers.
5. Payment Report
Purpose: Summarizes payment methods used (cash, card, UPI, etc.) and amounts collected.
Use Case: Reconciliation with bank deposits and payment mode analysis.
6. Best Selling
Purpose: Highlights the most frequently sold or highest-revenue products.
Use Case: Optimize inventory stocking and promotions.
7. Cash Register
Purpose: Logs cash inflows/outflows (sales, expenses, drawer adjustments).
Use Case: Ensure cash accountability and detect discrepancies.
8. Return Report
Purpose: Records returned items with reasons, quantities, and refund amounts.
Use Case: Analyze return reasons (e.g., defects, customer dissatisfaction).
9. Day Book
Purpose: A comprehensive ledger of all daily transactions (sales, purchases, expenses).
Use Case: Financial auditing and bookkeeping.
10. Stock Report
Purpose: Shows current inventory levels, stock movements, and low-stock alerts.
Use Case: Prevent stockouts and manage reordering.
11. Product Summary
Purpose: Aggregates product-wise sales data (total sold, revenue, discounts).
Use Case: Compare product performance and adjust pricing strategies.
12. B2B Report
Purpose: Details transactions with other businesses (GST-compliant invoices).
Use Case: GST filing and B2B customer analysis.
13. B2CS Report
Purpose: Summarizes Business-to-Consumer (B2C) sales, typically for small transactions.
Use Case: Compliance with GST rules for retail sales.
14. HSN Report
Purpose: Categorizes products by HSN (Harmonized System Nomenclature) codes for tax filing.
Use Case: Mandatory for GST returns in India.
To connect a Delivery / Courier Partner in the TMDSuite, follow these main paths:
Extensions → Extensions → Shipping (Enable & configure delivery method)
Website Builder → Pickup Address (Add pickup/warehouse details)
Reports → Order List (Generate delivery labels after setup)
Enable Delivery / Courier Partner (Shipping Extension) Important: Create Courier Account First
Before configuring the delivery partner in TMDSuite, you must create an account with the selected courier/delivery service provider.
After account creation, the courier company will provide:
API Key
API Token / Authentication Credentials
Base URL / API Endpoint
These credentials are mandatory to connect the courier service with the TMDSuite Profile and enable delivery features.
Step 1: Open Shipping Extensions
Go to Extensions → Extensions
From Choose the extension type, select Shipping
You will see the available shipping methods.
Step 2: Select Delivery / Courier Partner
Locate Delivery (Courier Partner)
Ensure the Status is set to Enabled
Click on the Edit (✏️) button
Step 3: Configure Courier Company Details
Inside Delivery Service Settings, enter the courier partner information:
Title – Display name of the delivery service (e.g., Delivery / Courier Name)
API Key – API key provided by the courier company
Base URL – Courier API base URL (e.g., tracking or service URL)
API Token – Secure token provided by the courier partner
Sort Order – Priority order for checkout display
Status – Set to Enabled
⚠️ Note: Valid API credentials are mandatory to activate delivery services.
Click Save to store the courier partner configuration.
4. Add Pickup Address (Mandatory Step)
After configuring the courier partner, you must add a pickup address.
Navigation Path
Website Builder → Pickup Address
Step 1: Open Pickup Address Form
Go to the Website Builder menu
Click on Pickup Address
Step 2: Enter Pickup / Warehouse Details
Fill in all required pickup information:
Warehouse Name
Person Name (Contact person)
Email Address
Mobile Number
Address
Pincode / Zip Code
City
Country
Zone / State
Ensure all details match the courier partner records.
Click Save to confirm the pickup address.
5. Final Connection Confirmation
Once both steps are completed:
Courier partner API details are saved
Pickup address is added successfully
Your TMD Suite system is now connected with the Delivery / Courier Partner.
6. Generate Delivery Label from Orders
After successful integration, you can generate delivery labels directly from orders.
Order Flow
Go to Orders → Order List
Open a confirmed order
Select Generate Delivery Label
System sends order & pickup details to the courier API
Delivery label / AWB is generated
You can now:
Print shipping label
Track shipment using courier tracking
7. Delivery Charges Calculation
Delivery charges are calculated based on:
Configured delivery charge type
Distance between pickup address and delivery address
Order value (if applicable)
Charges are automatically added to the order bill.
8. Reports & Tracking (delivery partner panel)
After logging in to the delivery partner panel provided by the related delivery channel
Admins can view:
Total deliveries by partner
Completed vs failed deliveries
Delivery commission report
9. Edit / Disable Delivery Partner
Go to the Delivery Partners List
Click Edit to update details
Toggle Status to disable the partner temporarily
Disabled partners will not appear for new orders.
10. Common Issues & Troubleshooting
Courier not connecting?
Verify API Key and API Token
Check the Base URL provided by the courier
Delivery option not visible in orders?
Ensure Shipping → Delivery is Enabled
Confirm the Pickup Address is saved
Label generation failed?
Check order address completeness
Verify courier service availability for the pin code
11. Best Practices
Add multiple delivery partners for backup
Clearly define service areas
Regularly review delivery performance reports
Generate the delivery label.
Step 1: Generate AWB
Go to Orders → Order List
Open the confirmed order
Click on AWB Generate button
This will generate the AWB Number from the courier system.
Step 2: Mark Order as Ready to Ship
After AWB generation, click on Ready to Ship
⚠️ Important: Without clicking Ready to Ship, the Generate Label button will remain disabled.
Step 3: Generate Delivery Label
Once the order is marked Ready to Ship
Click on Generate Label
The shipping label will be generated successfully and available for download.
Step 4: Schedule Pickup
Enter Pickup Date
Enter Pickup Time
Click on Pickup Scheduled
After pickup scheduling, the delivery partner will reach the pickup location as per the scheduled date and time.
The PDF catalog allows customers to view and download a complete list of products with pricing, discounts, and images in a printable format.
1. Enable Catalog Download (Admin Settings)
Before customers can download the PDF catalog, the feature must be enabled by the store admin.
Navigation Path
Admin Panel → Website Builder → online store setting → General
Steps to Enable
Go to Website Builder from the left menu
Open Store Website and App Links
Select the General tab
Find the option Catalog Download
Set the value to Yes
Click Save
Once enabled, the catalog download option will appear on the store website.
2. Catalog Download on Store Website (Customer Side)
Where Customers See the Download Option
Visit the store website
Open any product category (e.g., Grocery, Confectionary, FMCG)
A Download button is displayed near the product listing controls (Sort / Show options)
Download Product Catalog PDF
Steps for Customers
Open the desired product category on the website
Click on the Download button
The system automatically generates a PDF Product Catalog
The PDF opens or downloads to the customer’s device
3. PDF Catalog Content
The generated PDF catalog includes:
Category Name
Product Image
Product Name
UPC / Barcode
Available Quantity
Minimum Order Quantity
Discount Percentage
Original Price
Final Price
This makes it easy for customers and bulk buyers to review products offline.
Use Cases
Share product list with customers via WhatsApp or Email
Offline price reference for sales teams
Bulk order planning for retailers
Printable catalog for in-store use
Billing & Payment FAQs
Desktop Plan FAQs
Document
1. Visit the Google Play Store
Download their application TMDSuite from mobile app store, And install it.
2. Visit the Sign-Up Page
Signup Fields and Steps
2.1 Enter Full Name
Details: Enter your full name as it should appear in your account profile. Example: "John Doe."
2.2 Enter Unique Store Name
Details: For business accounts, provide the name of your store or business.
This name must be unique in the system (like a username) without any space or special character.
Example: "DoeElectronics" or "MyRetailShop123."
2.3 Mobile Number
Details: Select your country code (e.g., +91 for India).
Enter your active mobile number. This number will be used for OTP verification.
Example: "+91 9876543210."
Before login you need to create store from TMDSuite signup page
Login Fields and Steps
1. Mobile Number
Details: Select the appropriate country code from the dropdown (e.g., +91 for India).
Enter the mobile number associated with your TMDSuite account.
Example: "+91 9876543210."
2. Password
Details: Enter the password you created during the signup process.
Ensure it matches the account’s password requirements.
Example: "Secure@1234."
2.1 Eye Icon
Tap the eye icon to view the password (optional, for verification while typing).
3. Sign In Button
Details: After entering your mobile number and password, click this button to log in to your store and redirect to your Catalog page. Ensure the credentials are accurate to avoid login errors.
4. Forgot Password?
Details: Link: Forgot Password? Click this link if you've forgotten your password.
You will be redirected to a password recovery process, which may involve OTP verification reset instructions.
5. Sign Up Option
If you don’t already have an account, click the "Sign Up" button to create one. This will redirect you to the signup form.
Validation: Ensure the mobile number format is correct and the password matches the one you used during signup.
Visit the store Dashboard page press the profile setting icon and follow the steps
Steps to Update Store Profile Information
1. Store Name
Detail: Enter or update the name of your store. This will be displayed on invoices and other documentation.
Example: "TMDbasket."
2. Store Owner Name
Detail: Enter or update the name of the person who owns the store. Example: "John Doe."
3. Email ID
Detail: Enter or update the email address for communication purposes.This email will be used for notifications and customer correspondence. Example: "info@tmdbasket.com."
4. Telephone
Detail: Provide the contact number for the store. Example: "+91 9876543210."
5. FSSAI Code
Detail: If your store deals with food items, update your FSSAI license number. Example: "12345678901234."
6. GST Number
Detail: Enter your Goods and Services Tax (GST) registration number. Example: "22AAAAA0000A1Z5."
7. GST Type
Detail: Select the applicable GST type for your store (e.g., Include, exclude).
8. Complete Order Status
Detail: Define how orders should be marked (e.g., Canceled or Completed).
9. Address
Detail: Enter the store's physical address. Example: "Shop 1, 2 Bhamian Road, 141015, Ludhiana."
10. State and City
Detail: Enter the state and city where your store is located. Example: "Punjab" (State), "Ludhiana" (City).
11. Currency
Detail: Specify the currency your store operates in. Example: "INR."
12. Store Logo Image
Detail: Upload a logo for display on your store invoice, JPEG, or PNG format (max size: 5MB). Example: "tmdbasket-100x100.png."
13. Signature Image
Detail: Upload the signature image, Display on the Supplier Bill JPEG, or PNG format (max size: 5MB). Example: "signature- 100x100.png."
14. Profile Image
Detail: Upload a profile image in PDF, JPEG, or PNG format (max size: 5MB). Example: "profile-100x100.png."
15 Update
Detail: completing all required fields, tap the Update button to save your changes.
Verify Input: Double-check all fields for accuracy before saving.
A category organizes products into groups, making it easier for customers to navigate, search, and find items. It also helps in managing and displaying products systematically in the store.
Steps to Add a Product Category in TMDSuite
Navigate to the Product Categories Section From the Left Bar
Visit the Category List press on the Floating button which is a plus sign, Add New Category Form
will open
1. Category Name
Detail: Add details about the category. This may appear in the store.
2. Sort Order
Detail: add sort order to organize the position of the category.
3. Upload an Image
Detail: upload a representative image for the category to enhance its appearance in the store.
please use image format jpg or png
3. Add Category button
Press the Button to add the category
Note: You can see the category on the category list page
You can edit category names, sort order, and category images.
Steps to Edit a Category in TMDSuite
Navigate to the Product Categories Section From the Left Bar
Visit the Category List press the 3 dots icon on the category item that you want to edit and press the edit option, The Form will open
1. Category Name
Detail: Update the category name if needed.
2. Sort Order
Detail: Update sort order to organize the position of the category.
3. Upload an Image
Detail: Replace or update the category image..
please use image format jpg or png
3. Save Category button
Press the Button to update the category
Note: You can see the category on the category list page
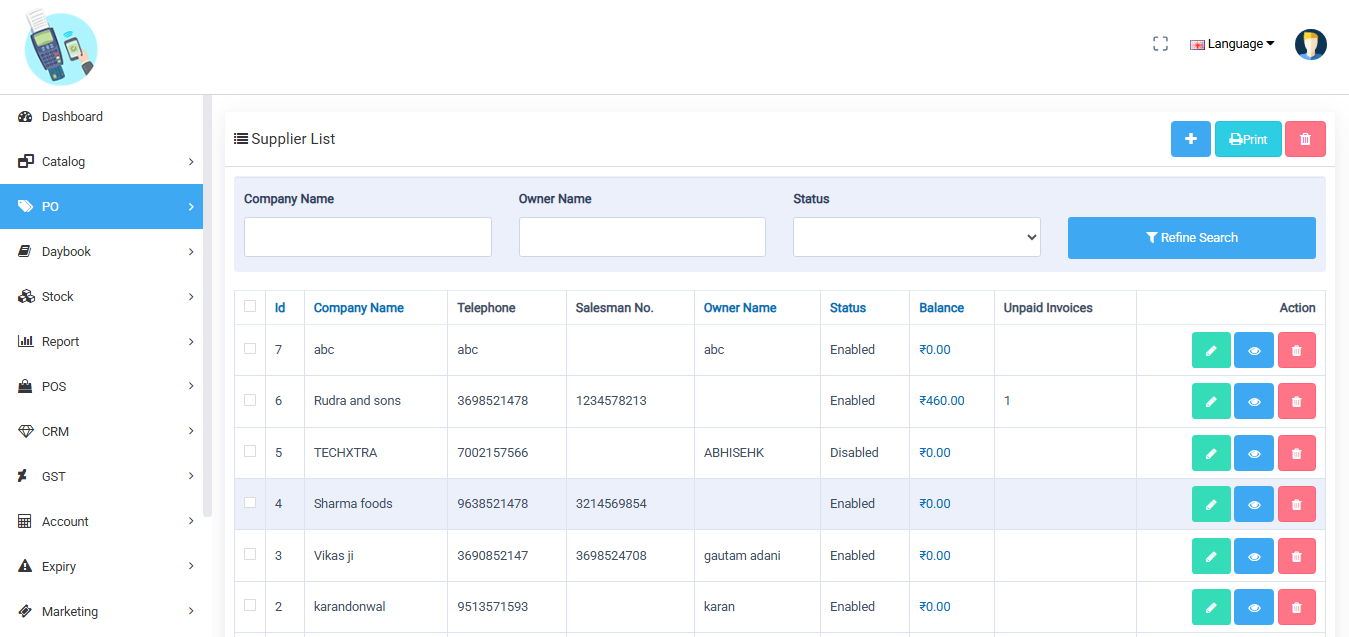
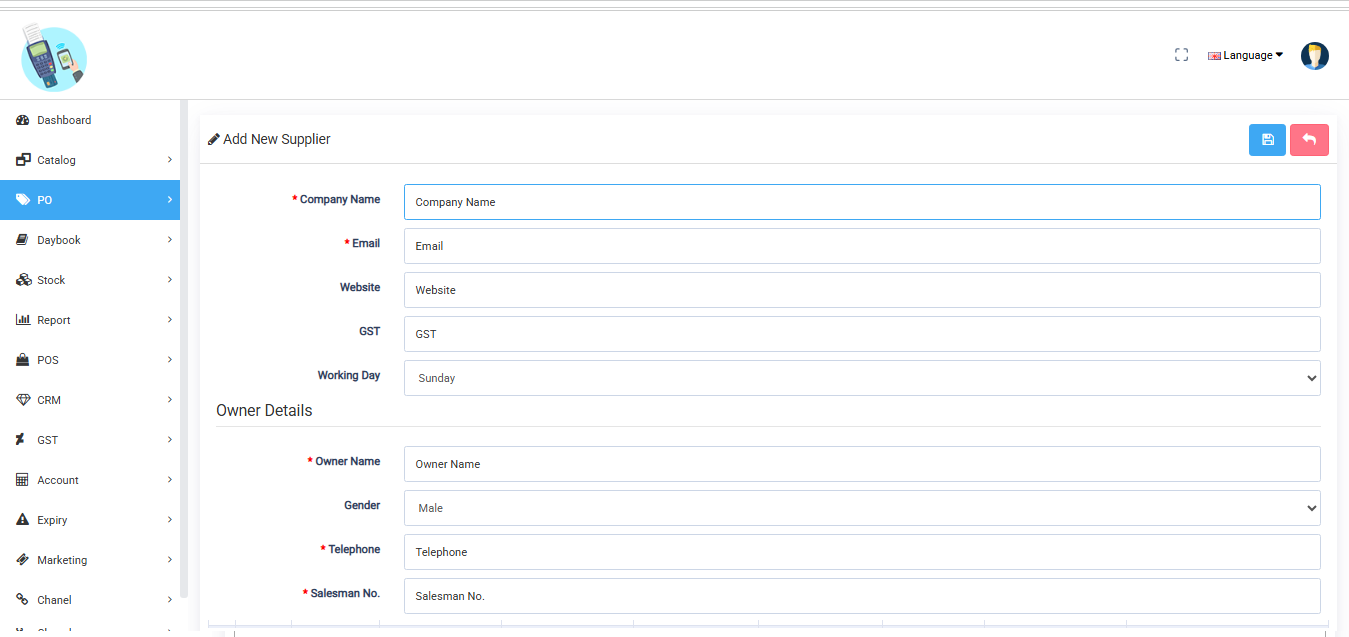
You can edit Supplier all the information.
Steps to Edit a Supplier in TMDSuite
Navigate to the Supplier Section From the Left Bar
Visit the Supplier List press the 3 dots icon on the Supplier item that you want to edit and press the edit option, The Form will open.
1. Company Name
Detail: Update the category Company Company if needed.
2. Company Mobile Number
Detail: Update Company Mobile Number
3. Salesman Name
Detail: Update the name of the company's salesman.
4. Salesman Mobile Number
Detail: Select the country code and enter the salesman's mobile number.
5. GST Number
Detail: Update the GST number of the company.
6. Address
Detail: Update in the company's address.
7. Country and Zone
Detail: Use the dropdown menus to Update the supplier's country and zone.
8. Description
Detail: Update details about the supplier.
9. Update Supplier Button
Detail: press the "Update Supplier" button to save the supplier's Update Information. page will redirect to the supplier list page
To sell a product through POS you need to add the product first.
Steps to Add a New Product
1. Product UPC Code
Detail: The Universal Product Code (UPC) is a unique identifier for the product.
Manually enter the code if known. Use the scanner icon to scan the code directly. The mobile
camera works as a scanner no need for barcode scanner or any hardware to scan barcodes. UPC
number automatically gets all product information. you need to just update or own price.
2. Add Product Image
Detail: To upload an image of the product for better identification.
How to Use:
Click the camera or "Add Product Image" icon.
Upload a file in PDF, JPEG, or PNG format, ensuring it is less than 5 MB in size.
3. Product Name
Detail: Enter a descriptive and accurate product name.
4. Sell Unit
Detail: The unit in which the product is sold (e.g., pieces, kilograms, liters).
Enter the unit type, or press "Add Sell Unit" to create a new unit if it's not listed.
5. Weight
Purpose: The weight of the product, is useful for inventory and shipping calculations.
How to Use: Enter the weight of the product (e.g., 500 grams, 1 kg).
6. MRP (Mandatory Field)
Detail: Maximum Retail Price, the highest price the product can be sold for. Enter the MRP value as per your product pricing.
7. Purchase Price
Detail: The cost price of the product when purchased from the supplier. Enter the purchase price
value.
8. Sell Price
Detail: The price at which you intend to sell the product to customers. Enter the selling price.
9. Opening Stock
Detail: The initial quantity of the product in inventory. Enter the number of units available at the start.
10. Brands
Detail: Specify the brand of the product. Select the brand from the dropdown list. Use "Add Brand"
to create a new brand if it is not listed.
11. MOQ (Minimum Order Quantity)
Detail: The smallest quantity a customer can purchase. Enter the minimum number of units for sale.
12. HSN Code
Detail: The Harmonized System of Nomenclature (HSN) code is used for taxation purposes.
Enter the appropriate HSN code as per the product category.
13. GST
Detail: Goods and Services Tax applicable to the product. Enter the applicable percentage (e.g., 5%, 12%, 18%).
14. CESS
Detail: Additional tax (Cess) if applicable. Enter the value or percentage of the cess.
15. Product Category
Detail: Organize the product under a specific category for better classification.
Select the category from the dropdown list. Press "Add Category" to create a new category
if needed.
Final Step: Add Product (Button)
After filling in all the necessary fields, Press the "Add Product" button to save the product
details.You will redirect that product list page
Navigate to the Product Section From the Left Bar
Visit the Product List press the 3 dots icon on the Product item that you want to edit and press the edit option, The Form will open.
Update Product Details
Product UPC Code
Purpose: The Universal Product Code (UPC) uniquely identifies the product.
How to Use:- Update the code manually if needed.
- Use the barcode scanner icon to scan and replace the code if required.
Update Product Image
Purpose: Replace or update the product image for better identification.
How to Use:- Click the camera or "Update Product Image" icon.
- Upload a new file in PDF, JPEG, or PNG format, ensuring it is less than 5 MB in size.
Product Name
Purpose: Update the name or title of the product to ensure it is descriptive and accurate.
How to Use: Replace the current name with the updated product name.Sell Unit
Detail: Update the unit in which the product is sold (e.g., pieces, kilograms, liters).
How to Use:- Modify the unit type if necessary.
- Select an existing unit from the list or press "Add Sell Unit" to create a new unit.
Weight
Purpose: Update the weight of the product, essential for inventory and shipping calculations.
How to Use: Replace the current weight with the updated value (e.g., 500 grams, 1 kg).MRP (Mandatory Field)
Detail: Update the Maximum Retail Price to reflect current pricing.
How to Use: Enter the updated MRP value.Purchase Price
Detail: Update the cost price of the product when purchased from the supplier.
How to Use: Modify the purchase price as necessary.Sell Price
Detail: Update the price at which you intend to sell the product to customers.
How to Use: Enter the new selling price.Opening Stock
Detail: Adjust the initial quantity of the product in inventory if needed.
How to Use: Enter the updated number of units available.Brands
Detail: Update the brand of the product.
How to Use: Select the new brand from the dropdown list or press "Add Brand" to create a new one if necessary.MOQ (Minimum Order Quantity)
Detail: Update the smallest quantity a customer can purchase.
How to Use: Enter the updated minimum order quantity.HSN Code
Detail: Update the Harmonized System of Nomenclature (HSN) code used for taxation.
How to Use: Replace the current HSN code with the appropriate one for the product category.GST
Detail: Update the Goods and Services Tax percentage applicable to the product.
How to Use: Modify the GST percentage (e.g., 5%, 12%, 18%).CESS
Detail: Update the additional tax (Cess) if applicable.
How to Use: Enter the new value or percentage of the cess.Product Category
Detail: Update the product category for better classification.
How to Use: Select a new category from the dropdown list or press "Add Category" to create a new one if needed.
Final Step: Update Product
After modifying all the necessary fields, click the "Update Product" button to save the changes.
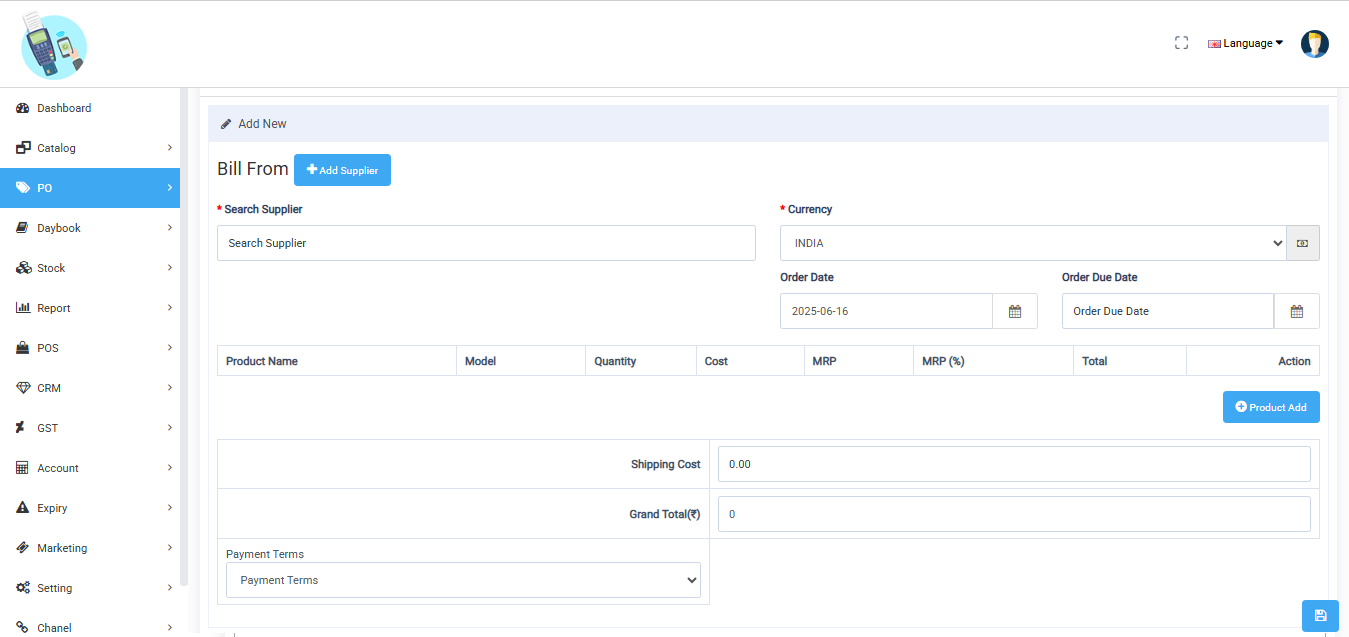
A Purchase Order (PO) is a formal document issued by a buyer to a supplier, specifying the products or services required, their quantities, prices, and delivery terms. It serves as a contract and authorization for the purchase.
Steps to Edit a Supplier in TMDSuite
Navigate to the purchase order Section From the Left Bar
Navigate to the purchase order Section From the Left Bar
Visit the Suppliers List and press on the
Floating button which is a plus sign, the Purchase Order Form will open. Enter Below details
Steps to create a purchase order (PO)
Select Supplier:
- Choose a supplier from the dropdown menu. In the image, "FRIENDS AGENCIES" is selected.
Set the Order Date:
- Pick the date for the order using the date picker next to the "Order Date" field. For example, "11/29/2024" is set.
Search and Add Product:
- Use the "Search Product" field to find the desired product. You can search by product name or scan a barcode using the icon provided.
Product Details:
- The product added to the list (e.g., "Hershey's Choco Delights 10.3g") is displayed with details like:
- Stock: Available stock quantity.
- Model: Product's model or barcode (e.g., 8901071704892).
- Product Qty: Adjust the quantity to order using the "+" or "-" buttons.
- Receive Qty: Input the quantity expected to be received.
- Cost: Unit cost of the product.
- MRP: Maximum Retail Price (optional).
- The total cost for the product is automatically calculated (e.g., ₹8.00 for 1 item).
- The product added to the list (e.g., "Hershey's Choco Delights 10.3g") is displayed with details like:
Additional Costs:
- Add any delivery charges in the "Delivery Charges" field if applicable (e.g., ₹0 in the image).
Review Total Price:
- Verify the total price at the bottom of the screen, which combines the product cost and any delivery charges (e.g., Total Price: ₹8.00).
Create the PO:
- Press the "Create PO" button to finalize and save the purchase order.
- The page will redirect On the Purchase order List
Steps to Add stock to product
Navigate to the stock in Section From the Left Bar Visit the stockin page.
Search for the PO ID
In the "purchase ID" section, you can either:
Enter the product's PO ID (e.g., "38" in the image) in the search bar and press the search icon.
or Use the barcode scanner icon to scan the product's UPC code. From mobile camera
Review Product Details
Once the product appears (e.g., "Hero cycle"), confirm the details such as:
Order Quantity: Displays the number of items to stock in (e.g., "9").
Pending Quantity: Displays the remaining quantity to be stocked (e.g., "9").
Cost, Discount, Sale Price, and MRP are also visible for review.
Enter Stock Details:
Update the following fields as needed:
Quantity (Qty): Enter the quantity you are adding (e.g., "9").
Cost: Confirm or edit the cost price (e.g., "5000.00").
Discount: Enter any discount applicable (e.g., "0.00").
Sale Price: Enter the sale price per unit (e.g., "0.00").
Batch Number: If applicable, enter the batch number.
Expiry Date: Select the expiry date if required (e.g., "27/12/2024").
Save the Details
After filling in all the necessary details, click the Update button to save the stock entry.
Verify that the stock quantity has been updated successfully
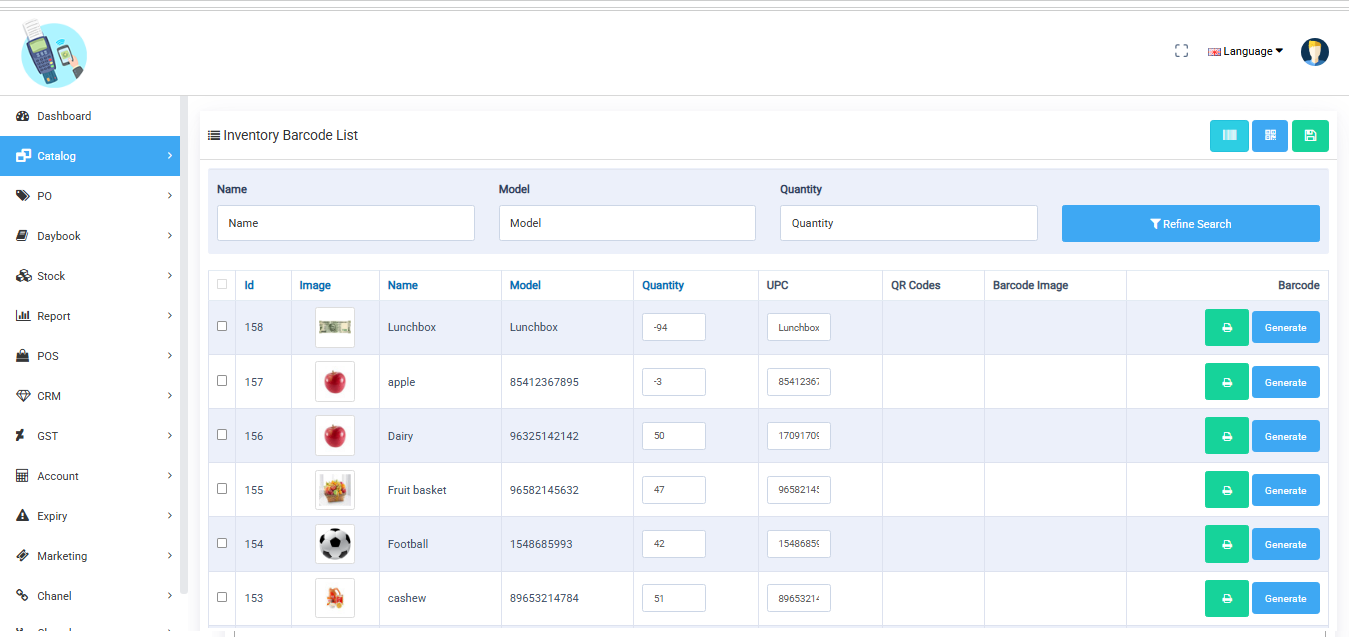
A product barcode is a unique visual representation of data, typically in the form of vertical lines or patterns, that encodes information about a product. It is used to identify items quickly and accurately in inventory, sales, or logistics processes.
Steps to generate product barcode
Navigate to the Left Menu Bar Section and press the Barcode Generator menu item.
Search for a Product
Use the search bar at the top to find a product by its UPC (Universal Product Code) or other identifiers.
Products listed will show their details, such as:
The red printer icon next to each product allows you to generate and print the barcode.
Print Barcode
Press the printer icon to generate the barcode label for the selected product.
Use a connected printer to print the barcode for labeling.
Live Stock refers to the real-time availability of a product in the inventory. It represents the current quantity of items physically present and ready for sale or distribution.
To check live stock in the TMDSuite application, follow these steps
Navigate to the Left Menu Bar Section and press the Live Stock menu item and visit live stock page.
Search for the Product
Use the Search Product bar at the top to find the product by name, UPC code. Alternatively, use the barcode scanner icon to scan the product's code directly.
View Product Details:
Product name:
Sell price:
sell unit :
product category:
Mrp:
Quantity:
HSN Code:
UPC code:
Bulk Discount:
And also display purchase history of the product
Purchase Date, cost, quantity etc..
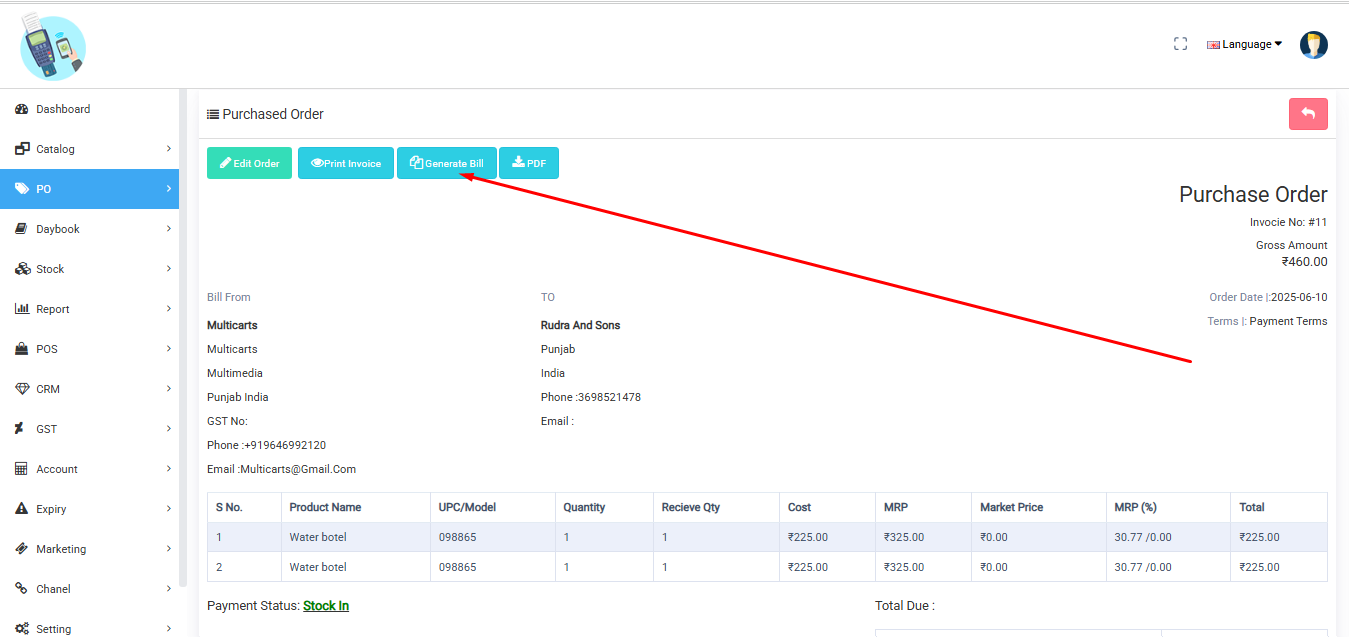
A POS Supplier Bill records purchases from suppliers, detailing items, quantities, prices, taxes, and payment terms. It updates inventory, tracks costs, manages vendor transactions, and ensures payment reconciliation. This document is vital for inventory management, accounting accuracy, and maintaining a smooth supplier-retailer relationship within the POS system.
To generate supplier bill in the TMDSuite application, follow these steps
Navigate to the Left Menu Bar Section and press the purchase order menu item and visit the purchase order page.
edit purchase order from 3 dots icon and there is a button at the bottom to generate the bill
Note: Before generating the bill please confirm stock in the product
To view supplier bill balance in the TMDSuite application, follow these steps
Navigate to the Left Menu Bar Section and press the supplier bill menu item and visit the supplier bill page.
The supplier bill list will be open and it will show the balance of every supplier row-wise
To update supplier bill payment balance in the TMDSuite application, follow these steps
Navigate to the Left Menu Bar Section and press the supplier bill menu item and visit the supplier bill page.
The supplier bill list will be open and it will show the view button of every supplier row-wise
After pressing the view button supplier bill detail page will open and on top of the page cash button, press the cash button and update payment. and print supplier bill also.
The Day Book form in this application records daily financial transactions, It tracks cash inflows and outflows, offering a consolidated view of daily business activity. This tool helps manage accounts, reconcile cash, and maintain accurate financial records for better operational control and analysis.
You can fill :
Opening Balance:
Cash:
QR Code:
Card:
Credit :
Manual entry:
In the TMDsuite application, a POS User refers to individuals operating the Point of Sale system, such as cashiers or sales staff. They handle transactions, manage billing, process payments, and update inventory. POS Users have specific roles and permissions tailored to ensure smooth retail operations within the TMDsuite ecosystem.
To add new pos user in the TMDSuite application, follow these steps
Navigate to the Dashboard:
Go to the footer menu bar and select the Dashboard menu item to visit the page.
Click on the user icon to open the POS User page.
Open the User Form:
Press the floating button to open the "New POS User" form.
Fill in the User Information:
Name: Enter the user’s full name.
Username: Provide a unique username.
Phone Number: Add the user’s contact number.
Password: Set a secure password.
Status: Define the user’s status (e.g., Active/Inactive).
Set Permissions:
Select the user permissions to control their access, such as the POS screen, purchase orders, etc.
To the create a new user press submit button
Bulk product import through an XLS file in the TMD Suite application allows you to upload multiple products at once by providing the required details in a structured format. Here’s a step-by-step explanation of how this works, using the xls fields.
Steps for Bulk Product Import
Visit the dashboard and press bulk import
Download the XLS demo file
Template File: Use a template XLS file provided by TMDSuite.
Ensure the column headers in the XLS match exactly with the expected field names in the TMD Suite system.
Upc code, Image link, Product Name, Sell Unit, Weight, MRP, Purchase Price, Sell Price, Opening Stock, Brands, MOQ, MSN Code, GST, Cess, and Product Category.
UPC Code: The unique identifier for the product. Ensure it is in a valid format (numeric or alphanumeric as per your system's requirements).
Image: File path or URL for the product image.
Product Name: Name of the product.
Sell Unit: Unit of measurement (e.g., "piece," "kg").
Weight: Weight of the product in a specific unit (e.g., grams, kilograms).
MRP (Maximum Retail Price): The maximum price for retail sale.
Purchase Price: Cost price of the product for the business.
Sell Price: Price at which the product will be sold to customers.
Opening Stock: Initial inventory level for the product.
Brands: Brand name associated with the product.
MOQ (Minimum Order Quantity): The smallest quantity a customer can order.
MSN Code: Manufacturer's Serial Number or another unique identifier.
GST: Goods and Services Tax percentage applicable to the product.
Cess: Additional tax (if any) applied to the product.
Product Category: Category under which the product is listed (e.g., "Electronics," "Apparel").
Upload the XLS File
After add all information in xls row
Navigate to the Bulk Product Import section. Upload the prepared XLS file.
And the products will show on the product page.
TMDSuite application pos settings for configuring invoice details, pay method, opening balance, pay now, and stock in.
Invoice
Show Store Logo
Yes: The store's logo will be displayed on the printed or digital invoices.
No: The logo will not appear on the invoice.
Show Store Name
Yes: The name of the store will be included on the invoice.
No: The store name will be excluded from the invoice.
Show Store Address
Yes: The store's physical address will be displayed on the invoice.
No: The address will not be shown.
Show Store Telephone
Yes: The store's contact telephone number will appear on the invoice.
No: The telephone number will be omitted.
Show Order Date
Yes: The date when the order was placed will be shown on the invoice.
No: The order date will not be included.
Show Order Time
Yes: The specific time the order was placed will be displayed on the invoice.
No: The order time will not be shown.
Show Invoice Number
Yes: The unique invoice number will appear on the invoice for reference purposes.
No: The invoice number will not be shown.
Show Cashier Name
Yes: The name of the cashier who processed the transaction will be included on the invoice.
No: The cashier's name will not appear.
Show Shipping Mode
Yes: Show The shipping mode is on the invoice.
No: The Shipping Mode will not appear.
Show Order Note
Yes: The order note shows on the invoice.
No: The order note will not appear.
Upi id
Fill in your UPI ID which is shown on the payment method. The customer will pay through a QR code.
invoice text
Invoice Text and extra information on your invoice also
Before leaving the page please press the save button to save the data
TMDSuite application there are pos settings that allow adding a New pay method
Pay Method
Steps to Add a New Payment Method:
Press the Floating Add Button
Look for the floating "+" button (typically located at the bottom of the screen). Clicking it will open a form to add a new payment method.
Fill Out the Required Fields:
NAME:
Enter the name of the payment method, e.g., "Cash," "Credit Card," "UPI," or "PayPal."
This name will appear in the list of available payment methods during checkout.
CODE:
Assign a unique payment code to this method, e.g., "CASH" for cash payments or "CARD01" for a specific card type.
The code is often used internally for identification and processing.
Fee:
Enter any transaction fee associated with this payment method (optional).
Example: You can set a 2% fee for credit card payments or $1 for PayPal transactions.
Sort Order:
Specify the order in which the payment method will appear in the list during checkout.
Lower numbers (e.g., 1) appear first, and higher numbers (e.g., 5) appear later.
Order Status:
Choose the default order status when this payment method is selected.
Example: You might select "Paid" for cash payments or "Pending" for bank transfers.
Press the Save Button
After filling out all the fields, click the Save button to add the new payment method to your POS system.
The new payment method will now be available for use during checkout and will appear in the list of payment options.
Product Batch Number and Expiry Date
The product batch number and expiry date are crucial features for inventory and quality management, especially in industries like food, pharmaceuticals, and cosmetics.
Batch Number:
A unique identifier is assigned to a specific group of products manufactured under the same conditions. It helps in tracking and tracing products for quality control, recalls, or inventory management. For instance, if a defect or contamination is reported, the batch number allows businesses to identify and isolate affected items quickly.
Expiry Date:
Indicates the last date the product is safe or effective to use. It ensures customer safety and compliance with regulations. Tracking expiry dates helps prevent the sale of expired goods, minimizing health risks and legal issues.
Navigate to the Stock-in Tab
Open the POS Settings and select the stock-in option.
Show Batch Number
Option: Check "Yes" to enable the display of batch numbers during the stock-in process.
Purpose:
Allows users to input or view the batch number for each product being added to inventory.
Helps in tracking product batches for quality assurance, recalls, or inventory organization.
No: If unchecked, batch numbers will not be required or displayed during stock-in.
Show Expiry
Option: Check "Yes" to enable the display of expiry dates during the stock-in process.
Purpose:
Ensures that expiry-sensitive products (e.g., food, medicine) have their expiry dates recorded.
Facilitates proper stock rotation (FIFO/LIFO) and prevents selling expired products.
No: If unchecked, expiry dates will not be required or displayed during stock-in.
Once these options are enabled, fields for the batch number and expiry date will appear during the stock-in process, making them mandatory or optional based on your business needs.
Navigate to the stock-out Section From the Left Menu Bar and Press the stock-out menu item
Steps to Perform a Stock Out
Search for the Item
Use the search bar to locate the item you want to stock out.
Enter the item's name, UPC (Universal Product Code), or SKU (Stock Keeping Unit).
View Item Details
The item's details, such as the name ("Perfume"), UPC, and current stock (255 units in this example), are displayed.
Enter Cost
Input the unit cost of the item (e.g., 230.00).
Specify Quantity
Enter the quantity you wish to remove from stock (e.g., 5 units).
Handle Expiry Stock (if applicable)
Select whether the item is from an expired stock batch using the dropdown menu ("Yes" or "No").
Select Supplier (Optional)
If applicable, choose the supplier from whom the item was originally purchased.
Add a Note (Optional):
Provide additional details or comments about the stock out (e.g., reason for removal).
Update the Stock:
Once all details are filled in, click the "Update" button to finalize the stock-out process.
Outcome:
The entered quantity will be deducted from the current stock (e.g., 255 - 5 = 250 units remaining).
The inventory records will be updated accordingly.
To attach a printer to the TMDsuite application, follow these steps based on the Bluetooth settings
Steps to Attach a Printer
Navigate to the printer setting Section From the Left Bar Visit the blooth page.
Ensure Bluetooth is Enabled
Turn on Bluetooth on your device and the printer.
Make sure the printer is discoverable (refer to the printer’s manual for instructions).
Pair the Printer
Open the Bluetooth Settings on your device.
Tap Pair New Device.
From the list of available devices, select your printer (e.g., "MPT-II").
Follow any pairing instructions, such as entering a PIN (often “0000” or “1234”).
Confirm Connection
Once paired, the printer should appear under Connected Devices or Saved Devices .
Ensure there is a green dot or similar indicator showing it is connected.
Test the Printer
After attaching the printer, perform a test print to ensure it is functioning correctly.
Note: Grant the app the necessary permissions to access Bluetooth and location
A sales channel partner's account may be terminated under the following circumstances:
Violation of Payment Collection Policy: TMDSUITE strictly mandates that all customer payments must be made either via Demand Draft (DD) in the name of TMDSUITE or through direct bank transfer to TMDSUITE's account. This policy ensures transparency and security in all financial transactions. If a sales channel partner solicits or accepts payments through any other means, it constitutes a violation of our payment policy, leading to immediate account termination.
Engaging in Corrupt Practices: Integrity and ethical conduct are the cornerstones of our operations and partnerships. If a sales channel partner is found soliciting or accepting bribes from customers in the name of TMDSUITE, such behavior will result in immediate termination of the partnership. TMDSUITE has zero tolerance for corruption, bribery, or unethical practices.
TMDShopper Setting: These settings manage how your store appears and functions in the customer-facing website and TMDShopper mobile app. It helps you control branding, communication, delivery availability, and customer interaction via QR codes.
Like, your application URL is: https://multicarts.tmdsuite.com/frontdesk/
Then your online store URL is: https://multicarts.tmdsuite.com/
1. Privacy Policy
Allows you to link a privacy policy page from your site or a predefined content list.
Use: Ensures legal compliance and transparency with customers.
Example: Select "Privacy Policy – Website" from the dropdown, and it shows in the website sidebar.
2. Social Icons
Add your store’s social media links (Facebook, Instagram, WhatsApp, etc.) to appear on the website/app.
Use: Makes it easier for users to connect with you or follow your updates.
3. Store Delivery Timings Slot
Define specific delivery time slots that customers can choose while ordering online.
Use: Let customers select a convenient delivery window, improving satisfaction.
4. Weekend Leave
Select which days your store remains closed (e.g., Sundays).
Automatically disables ordering/delivery for those days on the website/app.
5. Scan QR to Open Store in Browser
Displays a QR code that opens your store website in a browser when scanned.
Use: Stick on counters, packaging, posters – makes it easy for customers to access your online store.
6. Scan QR to Open Store in TMDShopper App
A QR code that directly connects your store in the TMDShopper app.
7. Scan QR to WhatsApp Order
QR code that opens WhatsApp chat with a pre-filled catalog/order message.
Instant communication and ordering via WhatsApp – especially helpful for repeat customers.
The POS Settings option allows you to configure how your Point of Sale system works — from customer forms to invoice behavior, making billing smooth, fast, and customized to your store’s needs.
1. Customer Form
What it is:
Customize the form shown when adding a new customer at the POS.
Use:
Enable/disable fields like phone, email, and GSTIN
Make fields optional or required
Helps collect relevant customer data quickly
2. Customer Setting
What it is:
The default behavior for handling customers during billing.
Use:
Choose whether Customer Group
Set default customer (like "wholesale")
3. Order Return Reason
What it is:
List of predefined reasons for product returns.
Use:
Standardize the return process
Track why items are returned (e.g., expired, damaged, wrong item)
Useful for reporting and supplier claims
4. Payment Method
What it is:
Add or manage payment options available at checkout.
Use:
Add modes like Cash, UPI, and Card
Set the default payment method
Helps in tracking daily payments by type
5. Shipping Charges
What it is:
Define delivery charges or shipping fees for POS orders.
Use:
Add fixed or percentage-based shipping fees
Apply per order or based on conditions
Helps recover delivery costs
6. Invoice Settings
What it is:
Control how invoices look and behave in POS.
Use:
Upload Logo to display, Add upi id for display QR code
Customize logo, footer promotional message,
Add terms & conditions, GST info
Set invoice format: A4, Thermal
7. PayNow Setting
What it is:
Configure Payment Method: Cash, Card, UPI.
Use:
Redirect to the payment screen or finalize the invoice directly
Set rules for full payment
Add UPI QR or online link
8. Display Setting
What it is:
Controls what elements are visible on the POS screen.
Use:
Show/hide and set limit like Page Limit, image size, Opennig Balance Popup.
9. Non-Catalog Setting
What it is:
Manage how non-catalog (manual) items are added to the cart.
Use:
Set the default product to show the non-catalog option on pos screen
Getting Started
To become a sales channel partner, please visit our Partner Signup page on our website. Complete the registration form, and submit the required documents for verification.
There are 4 steps to complete the verification. Each steps are given 20%. And the rest 20 points will be given by us. After verification is completed. You will have 100 points which make you eligible for sales channel partner.
- Singup form (20 poitns)
- Addharcard + pencard (20 poitns)
- GST verification (optional)
- Bank Verificaion (20 poitns)
- Video Verificaion (20 poitns)
NOTE: After approval, you'll be officially part of our sales channel partner program.
Currently, we are open to all people who are familiar with the online website and software. It will be useful during the training program or when you reach a customer.
We provide comprehensive training sessions covering product knowledge, sales techniques, and market strategies. Additionally, you'll have access to our online resources, including sales brochures, product demos, and FAQs.
It typically depends on how fast the partner submits the details. After crose verifies the details one of our team will approve the account within 1-2 days. If there is any further information needed. We will contact the partner manually.
Mobile app
Yes! The Mobile Plan is free under these conditions:
- Up to 3 users
- 500 stock entries per month
- 1,000 billings per month
- If your business exceeds these limits, you will need to upgrade to a paid plan.
Yes! You can upgrade at any time to unlock unlimited users, stock, and transactions.
Support & Account Management FAQs
TMD SUITE Information
Our ERP software offers low prices in the market. Apart from pricing, it has unique features such as real-time analytics, customisable modules, and seamless integration capabilities with third-party apps. Additionally, our user-friendly interface and robust support ensure a smooth experience for end-users.
Yes, we offer various versions tailored to different business sizes and industries. Each version is designed to meet the specific needs of small, medium, and large enterprises across sectors.
We have a roadmap for continuous improvement and regularly release new features. Major updates are typically released quarterly, while minor updates and bug fixes are more frequent.
We have a roadmap for continuous improvement and regularly release new features. Major updates are typically released quarterly, while minor updates and bug fixes are more frequent.
Yes, clients can request custom features through their sales channel partner. These requests are evaluated by our product development team for feasibility, and we'll work with you to determine the best approach for implementation.
Sales channel partners receive regular newsletters, product updates, and invitations to exclusive webinars that cover the latest developments, upcoming features, and best practices for selling and supporting our ERP software.
We regularly update the software to introduce new features, improve performance, and address security. Updates are tested thoroughly before release, and partners will be notified in advance to prepare for any changes.
Sales channel partners can request new features or report bugs through our dedicated partner portal. Our development team reviews all submissions, and you will receive updates on the status of your request.
Currently, we are working on this. Our approach is
flexible in mind, offering robust APIs and middleware solutions for integration with a wide range of systems, including CRM, eCommerce, and legacy databases. We will provide detailed documentation and support to facilitate seam.
Whenever it is ready, we announce it and publish information on the partner portal too.
Customization is a core feature of our ERP software. It can be tailored to meet specific business processes and requirements, from modifying workflows to creating custom reports. Our technical team supports partners in understanding customization limits and p
Sales and Commission
Commissions are calculated based on the subscription plan chosen by the customer and the total sales volume. On every sale, a sales channel partner will get a 50% commission in the first year and from the second year onward, the sales channel partner will receive a 30% commission until the customer is subscribed to TMDSUITE.
If you are looking for more information. Please contact us directly on via contact us page or email us.
A sales channel partner's account may be terminated under the following circumstances:
Violation of Payment Collection Policy: TMDSUITE strictly mandates that all customer payments must be made either via Demand Draft (DD) in the name of TMDSUITE or through direct bank transfer to TMDSUITE's account. This policy ensures transparency and security in all financial transactions. If a sales channel partner solicits or accepts payments through any other means, it constitutes a violation of our payment policy, leading to immediate account termination.
Engaging in Corrupt Practices: Integrity and ethical conduct are the cornerstones of our operations and partnerships. If a sales channel partner is found soliciting or accepting bribes from customers in the name of TMDSUITE, such behavior will result in immediate termination of the partnership. TMDSUITE has zero tolerance for corruption, bribery, or unethical practices.
When a customer bought the TMDSUITE software. Then the commission amount is immediately reflected in the sale channel partner account. But can not withdraw it. Customers can ask for a refund within the first 30 days after purchasing the TMDSUITE.
When a customer is happy to use the software and 30 days passed. Then the commission will be available to withdraw.
If you are still not clear. Please contact us over email, call or raise the ticket.
Commissions are paid out monthly. You must have a valid bank account registered with us, and all payouts are processed through bank transfers.
Yes, we are working on it. When it is ready we will let you know personally.
The tool consists of comprehensive analytics and reporting tools designed to track sales performance, identify trends, and uncover opportunities for growth. Partners have access to custom dashboards and reports that can inform strategic decision-making.
Customer success stories are valuable for both our brand and our partners. We encourage you to document and share these stories, following guidelines to protect customer privacy. Our marketing team can assist in crafting and promoting these narratives.
For now, a partner can give us 3 sales per month and quarterly 10 sales.
While we encourage all partners to strive for growth, we understand market dynamics vary. Specific targets are set collaboratively, Based on realistic assessments of market potential and partner capacity.
Yes, we offer incentive programs for sales channel partners who exceed their sales targets. These incentives include additional commission rates, bonuses, and exclusive access to new products and features.
Partner Training
Advanced technical training for partners includes deep dives into product architecture, custom development ideas, and integration techniques. Partners can enroll through the partner portal or by contacting their partner manager for upcoming sessions and prerequisites.
We provide a range of resources, including user manuals, video tutorials, webinars, and a knowledge base. These resources are designed to help clients understand and utilize the ERP software effectively.
Partners are given access to our product development roadmap through regular briefings, newsletters, and dedicated sections within the partner portal. These resources offer insights into upcoming features, integrations, and strategic directions.
For partners interested in specializing, we offer industry-specific training programs that cover market challenges, regulatory requirements, and best practices. These programs are designed to equip partners with the knowledge to serve clients in specialized sectors effectively.
Expansion and Growth
Partners have access to a dashboard that tracks sales performance, customer feedback, and other key metrics. This tool helps identify trends, areas for improvement, and opportunities for training or development.
Our strategy includes market research, tailored marketing materials, and dedicated support for entering new markets or industries. We also offer insights into industry trends and customer needs to help partners tailor their approach effectively.
Partners are provided with regular updates, release notes, and training on new features and software updates. Ensuring partners are
well-informed enables them to provide customers with consistent and accurate information.
We support sustainable growth through ongoing education, market development funds, co-marketing opportunities, and performance incentives. These initiatives are designed to help partners grow their business sustainably while maintaining high levels of customer satisfaction.
Successful partnerships are recognized through awards, case studies, and spotlight features in our communications. We celebrate achievements in sales excellence, innovation, customer service, and community contribution, highlighting the value of strong partnerships within our ecosystem.
Long-term partners enjoy benefits such as higher commission tiers, priority support, access to beta features for testing, and opportunities for co-marketing efforts. We value our partnerships and aim to grow together.
We welcome collaboration on marketing initiatives such as webinars, case studies, and co-branded events. Partners interested in these opportunities should contact their partner manager to discuss ideas and support available from our marketing team.
Marketing and Sales
We strive to maintain transparency and fairness among our partners. In competitive situations, we encourage collaboration and dialogue to best serve the client's interests, potentially leading to shared projects or referral agreements.
Sales channel partners are encouraged to create their own marketing materials. However, all materials must adhere to our brand guidelines and be approved by our marketing department to ensure consistent branding.
A sales channel partner's account may be terminated under the following circumstances:
Violation of Payment Collection Policy: TMDSUITE strictly mandates that all customer payments must be made either via Demand Draft (DD) in the name of TMDSUITE or through direct bank transfer to TMDSUITE's account. This policy ensures transparency and security in all financial transactions. If a sales channel partner solicits or accepts payments through any other means, it constitutes a violation of our payment policy, leading to immediate account termination.
Engaging in Corrupt Practices: Integrity and ethical conduct are the cornerstones of our operations and partnerships. If a sales channel partner is found soliciting or accepting bribes from customers in the name of TMDSUITE, such behavior will result in immediate termination of the partnership. TMDSUITE has zero tolerance for corruption, bribery, or unethical practices.
Currently, there are no geographical restrictions. However, we encourage partners to focus on markets where they have strong local insights and customer relationships.
We recommend focusing on niche markets where our ERP solution offers unique value, leveraging case studies and testimonials, and conducting regular training sessions for your sales team to improve their product knowledge and sales techniques.
How can partners share knowledge and collaborate with each other to improve overall service quality?
We foster a community among our sales channel partners through forums, conferences, and online platforms where partners can exchange knowledge, strategies, and experiences. Collaborative learning and sharing are encouraged to elevate service quality across the network.
Absolutely. We continuously explore new markets and sectors where our ERP software can be competitive. We encourage partners to identify and propose such opportunities, and we provide support for market analysis and entry strategies
We support partners targeting untapped markets through market analysis, lead-generation campaigns, and localized marketing materials. We also offer strategic planning sessions to tailor the approach to specific market needs.
Policies and Procedures
Data security is paramount. Our ERP software employs multiple layers of security, including encryption, access controls, and regular security audits. We adhere to international data protection standards to ensure client data is secure and compliant.
Compliance with global data protection regulations is built into our ERP software. We continuously update our policies and procedures to align with the latest regulations, providing tools and guidelines to help partners and clients manage their data lawfully.
The standard agreement duration is one year, automatically renewable unless either party opts out. We review partnership performance annually to discuss terms, support, and opportunities for growth.
Partner Feedback and Product Development
Partners can submit feature enhancement requests and feedback directly through the partner portal. We hold regular feedback sessions and surveys to gather input, ensuring that customer needs and market demand guide our product development.
Yes, we highly value our partners' insights during product development. Partners have the opportunity to participate in beta tests and early access programs, providing feedback that shapes the final product release.
Yes, we facilitate partner forums and online platforms for the exchange of best practices, innovative uses of the ERP software, and success stories. These collaborative spaces encourage learning and innovation within the partner community.
We highly value partner input for continuous improvement. A formal suggestion process is in place, allowing partners to submit enhancement requests via the partner portal. These suggestions are reviewed regularly by our product development team.
Yes, there's a formal process for submitting product feedback or feature requests through the partner portal. We encourage partners to share insights from client experiences to inform product development and prioritization.
Partners are involved in the product roadmap through regular roadmap sessions, surveys, and a partner advisory council that collects and discusses feedback on feature development and product direction.
Yes, we highly value feedback from our sales channel partners and their customers. Regular surveys, feedback sessions, and our partner advisory board offer avenues for influencing product roadmap and feature prioritization.
Technical Support
Sales channel partners have access to priority technical support via email, phone, and live chat. We also provide detailed product documentation and troubleshooting guides.
Software updates, including critical security patches, are communicated through multiple channels, such as email alerts, partner portal announcements, and direct account manager notifications. We ensure partners and their clients are promptly informed to maintain system integrity and security.
For technical inquiries beyond the provided training and resources, partners are encouraged to contact our technical support team. This ensures that potential customers receive accurate and comprehensive answers.
We provide a comprehensive knowledge base, troubleshooting guides, FAQs, and community forums where partners can find solutions to common issues. These resources are designed to empower partners to resolve problems quickly, with escalation paths clearly defined for more complex issues.
Yes, we offer advanced training sessions covering sales strategies, deep technical knowledge, and industry-specific applications of our ERP software. These are available upon request for partners who have completed the initial training program.
Partners have access to priority technical support through dedicated channels, including a direct hotline, email, and a partner-exclusive support portal. For critical implementations, we also offer the option of on-site support or dedicated remote assistance.
Absolutely. We offer a certification program for sales channel partners. This certification acknowledges your expertise in our ERP software and enhances your credibility with potential clients.
For unresolved technical issues or complex inquiries, partners have access to an escalation process that involves higher levels of support, including direct access to product specialists and engineering teams. This ensures timely resolution of complex issues.
Sales channel partners are expected to provide first-level support to their clients, including basic troubleshooting and usage guidance. Our team will handle more advanced technical support, escalations, and feature requests.
We have an incident management process in place for major issues, including timely communication updates through our partner portal and direct contacts. Our priority is to resolve any such issues swiftly and minimize the impact on our clients and partners.
Partner Conduct and Ethics
We expect all partners to adhere to the highest standards of professional conduct and ethics. This includes honest advertising, respecting customer privacy, and compliance with all local and international laws.
We expect all partners to adhere to the highest standards of professional conduct and ethics. This includes honest advertising, respecting customer privacy, and compliance with all local and international laws.
We highly value feedback and suggestions. Partners can submit feedback through the partner portal or contact their dedicated account manager directly.
While we understand the value of offering complementary products and services, we require partners to ensure there are no conflicts of interest. Partners should disclose such offerings to discuss compatibility and alignment with our policies.
Software Updates and Communication
Our team will notify you of upcoming updates and upgrades. It's the responsibility of sales channel partners to communicate this information to their clients and assist with the update process if necessary.
Customer feedback is collected through various channels, including direct support interactions, partner feedback, and user forums. This feedback informs our product development priorities. Partners are encouraged to share comprehensive customer feedback for analysis and action.
How can we ensure our sales and technical teams remain up-to-date with the latest product knowledge?
We provide ongoing training sessions, update briefings, and a wealth of online resources to keep your teams informed. Regular participation in training and webinars is encouraged to maintain a high level of product knowledge.
Termination and Reinstatement
A sales channel partner's account may be terminated under the following circumstances:
Violation of Payment Collection Policy: TMDSUITE strictly mandates that all customer payments must be made either via Demand Draft (DD) in the name of TMDSUITE or through direct bank transfer to TMDSUITE's account. This policy ensures transparency and security in all financial transactions. If a sales channel partner solicits or accepts payments through any other means, it constitutes a violation of our payment policy, leading to immediate account termination.
Engaging in Corrupt Practices: Integrity and ethical conduct are the cornerstones of our operations and partnerships. If a sales channel partner is found soliciting or accepting bribes from customers in the name of TMDSUITE, such behavior will result in immediate termination of the partnership. TMDSUITE has zero tolerance for corruption, bribery, or unethical practices.
The process for terminating a sales channel partner's account involves the following steps:
Investigation: Upon receiving any allegations of policy violations, TMDSUITE will conduct a thorough investigation to gather facts and evidence related to the reported misconduct.
Notification: If the investigation substantiates the violation, the sales channel partner will be notified of the findings and the impending termination of their account.
Account Termination: The account will be formally terminated, and the sales channel partner will be informed of the termination details, including the effective date and any necessary actions required on their part, such as the settlement of outstanding dues or the return of marketing materials.
Appeal Process: Sales channel partners have the right to appeal the termination decision within a specified period by presenting additional information or clarification regarding the alleged violations. TMDSUITE will review the appeal and make a final decision.
Consequences of account termination may include:
- Loss of rights to sell and promote TMDSUITE products and services.
- Forfeiture of any pending commissions or incentives.
- Disqualification from future partnership opportunities with TMDSUITE.
- Legal actions if the violation involves criminal activities or significant financial losses to TMDSUITE or its customers.
- Other unlawful activity
Sales channel partners can ensure compliance by:
Thoroughly understanding and adhering to all policies outlined in the sales channel partner agreement and TMDSUITE’s partner policies.
Attending regular training sessions provided by TMDSUITE on ethical conduct, sales processes, and compliance.
Consult TMDSUITE’s partner support team if there are any uncertainties or questions regarding policy implementation and compliance.
Reinstatement of a terminated sales channel partner is considered on a case-by-case basis, depending on the nature of the violation, the outcome of the appeal process, and the partner’s willingness to rectify the misconduct. However, reinstatement is not guaranteed and is subject to TMDSUITE’s discretion and a rigorous review process.
Miscellaneous
